Press DOWNLOAD button in order confirmation screen or in email
Step-by-step instructions for loading
presets into the Lightroom© mobile
We are glad to see you in our step-by-step instructions. Below in this guide, we’ve covered (including screenshots) the entire installation and use of presets so that you can quickly and easily install DNG presets in the Lightroom mobile app.
Use one-click presets to get the magic of editing exposure, brightness, and color in your photos.
Read these simple steps below and follow the screenshots so that you miss nothing, let’s go!
1. Install Lightroom Photo Editor app on your iPhone
This is a free app available for iPhone users. Click on icon below to download!

Download Lightroom on the App Store
If you are Android user – please read Step-by-step instructions for loading presets into the Lightroom© mobile for Android here: https://tuneitreal.com/how-to/setup-preset-for-android/
2. Download and extract presets to your iPhone
We’ve made loading presets faster and easier. You can download presets directly from our website (we use Safari) or from order email.

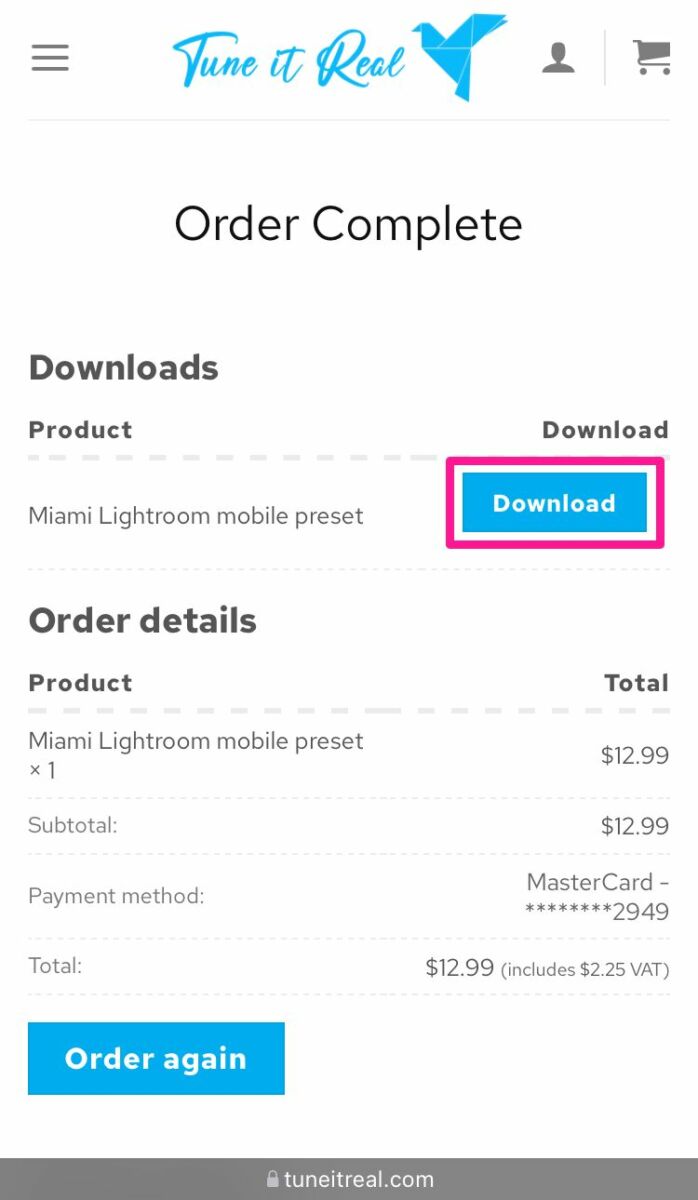
Press DOWNLOAD button in order confirmation screen or in email
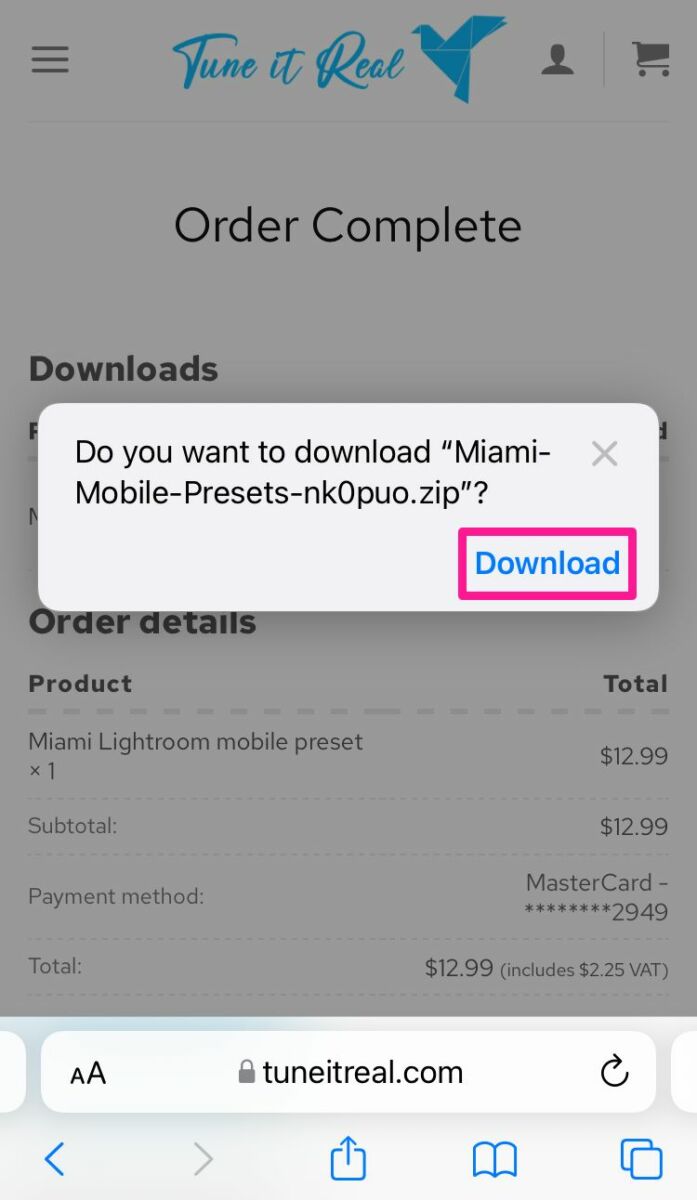
Confirm download
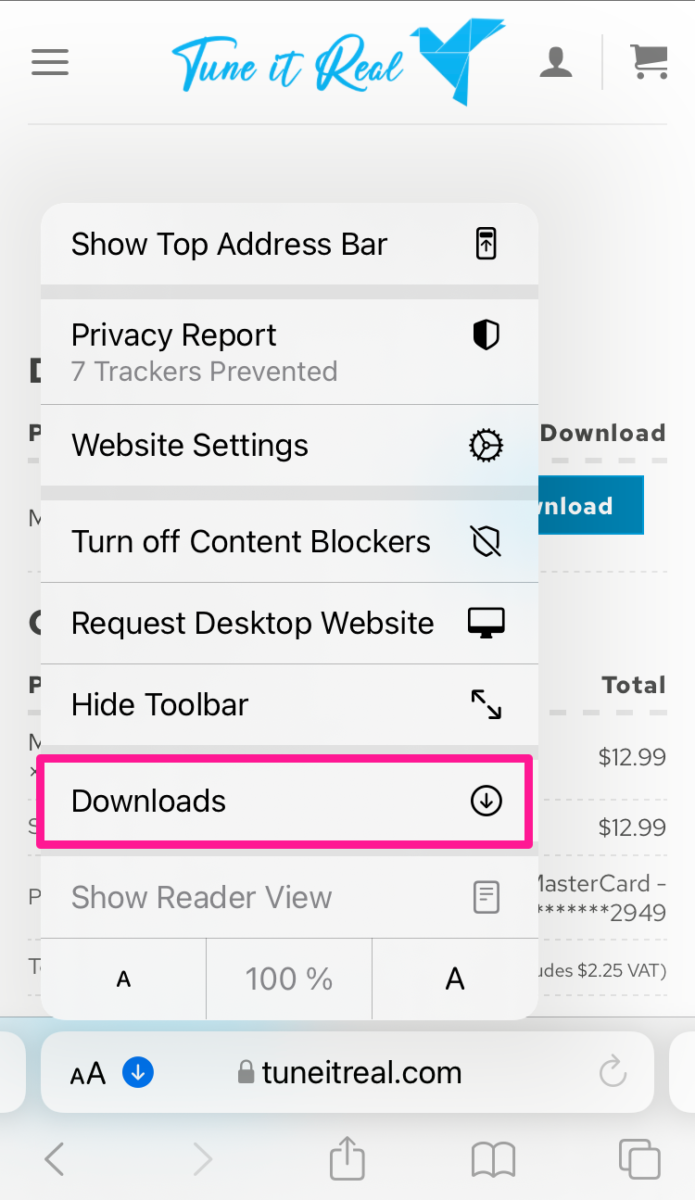
Open Download folder in FILES app
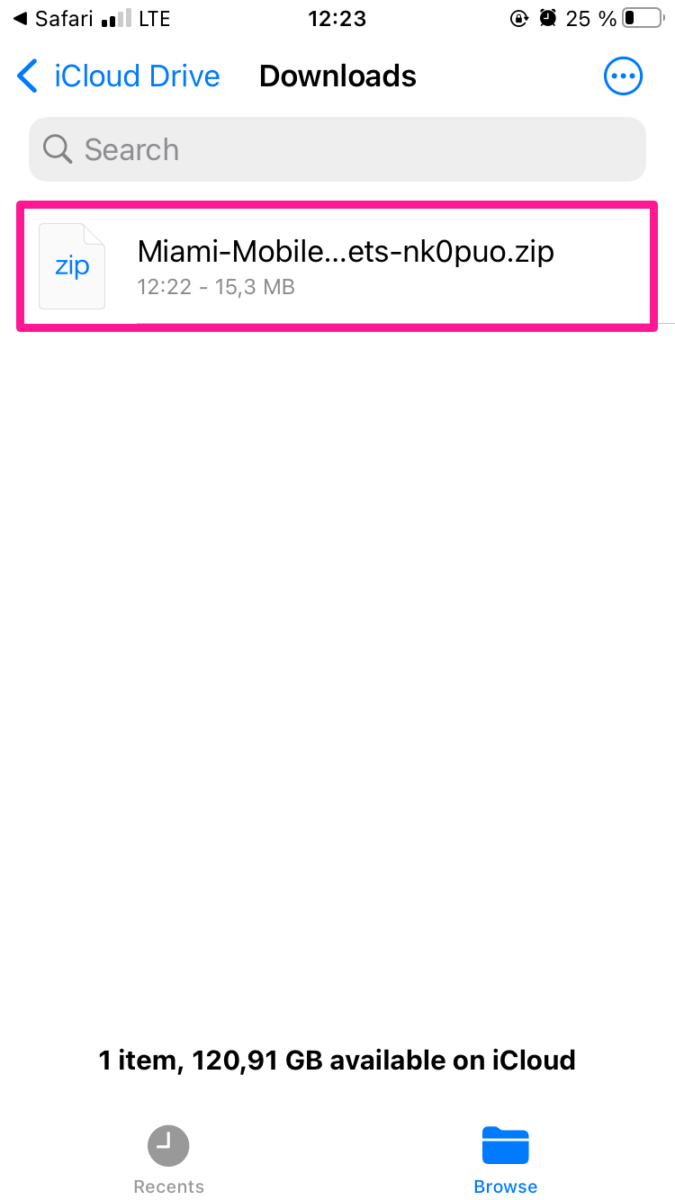
Click ZIP file and it will unarchive
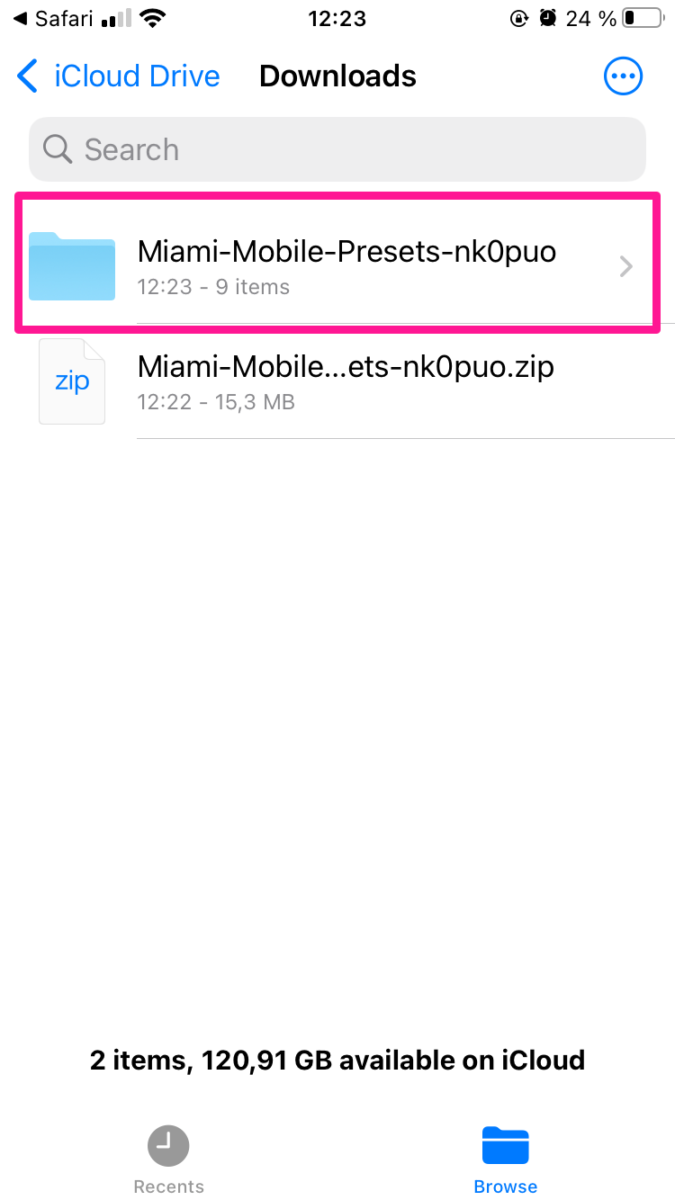
Choose Preset folder
3. Select and import presets to Lightroom mobile
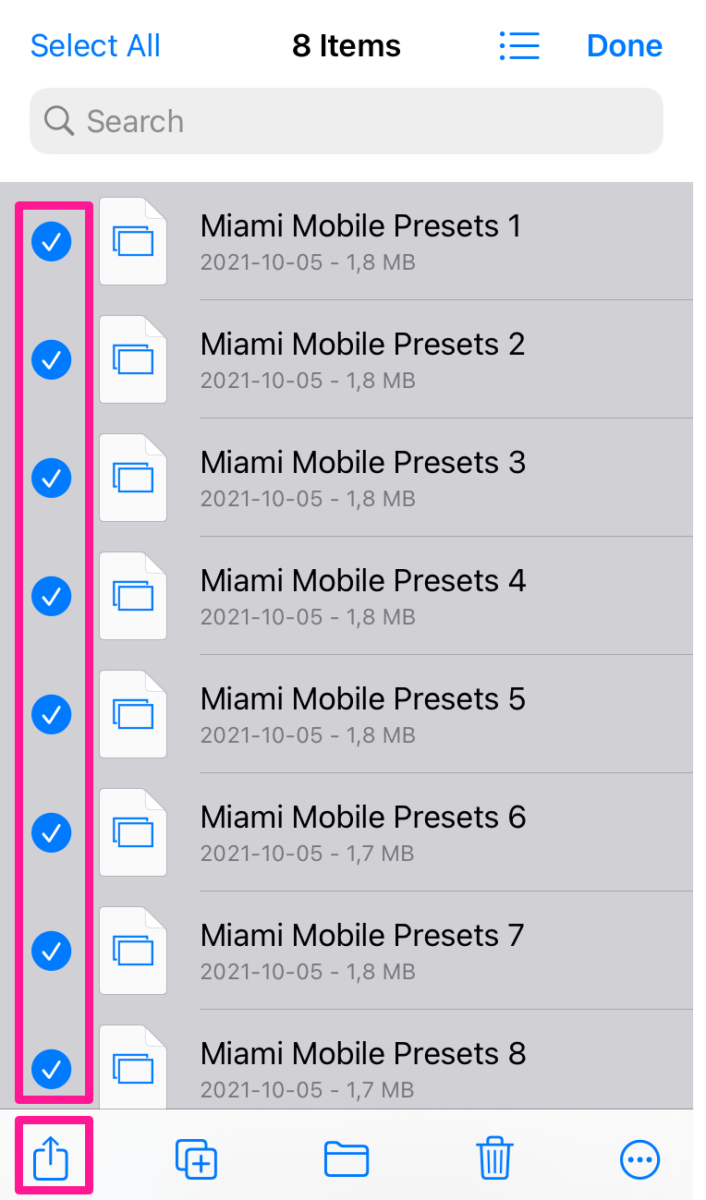
Select all presets and press Share icon
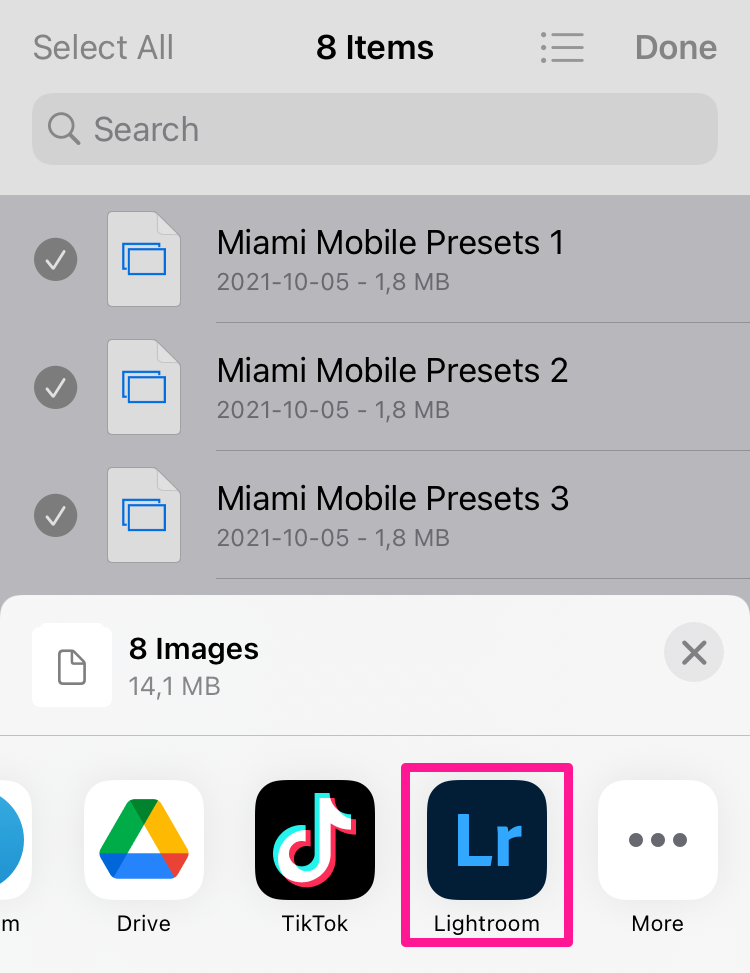
Select Lightroom app
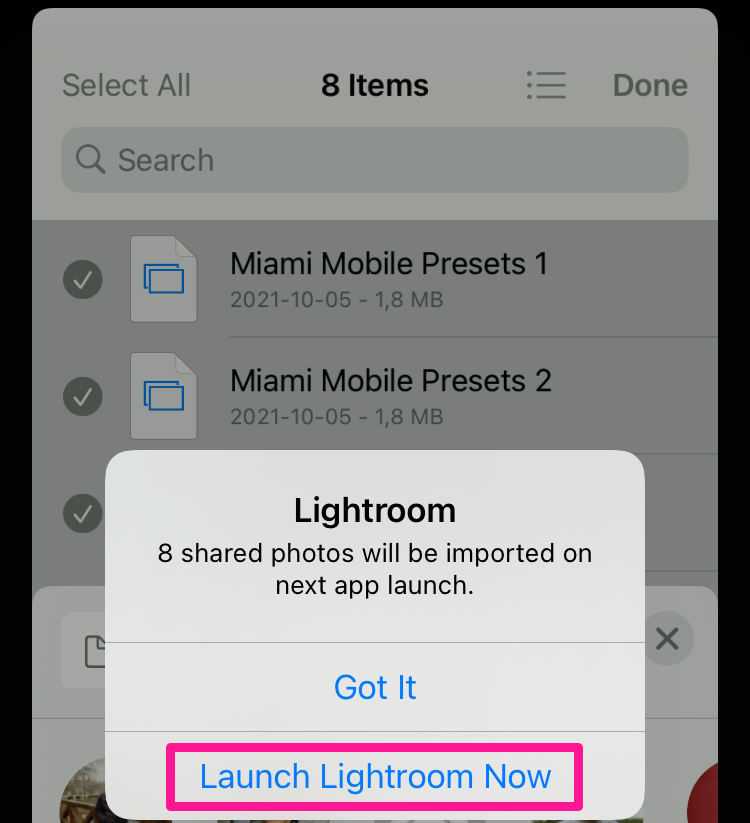
Launch app
4. Create presets in Lightroom app
So, you’ve loaded the preset into Lightroom, it’s time to add it to the editing panel in the Presets tab. So, open the picture with the preset that we just imported into Lightroom, click on the 3 dots in the upper right corner and select “Create Preset”.
Enter a Preset Name and Create a new preset group for convenience. To do this, click on “Create New Preset Group”. After creating a new group, select All checkboxes (Tools, Light, Color, etc.) and click on the checkmark in the upper right corner to save.
Preset has been saved to your Lightroom in the editing panel. Repeat this step for other presets.
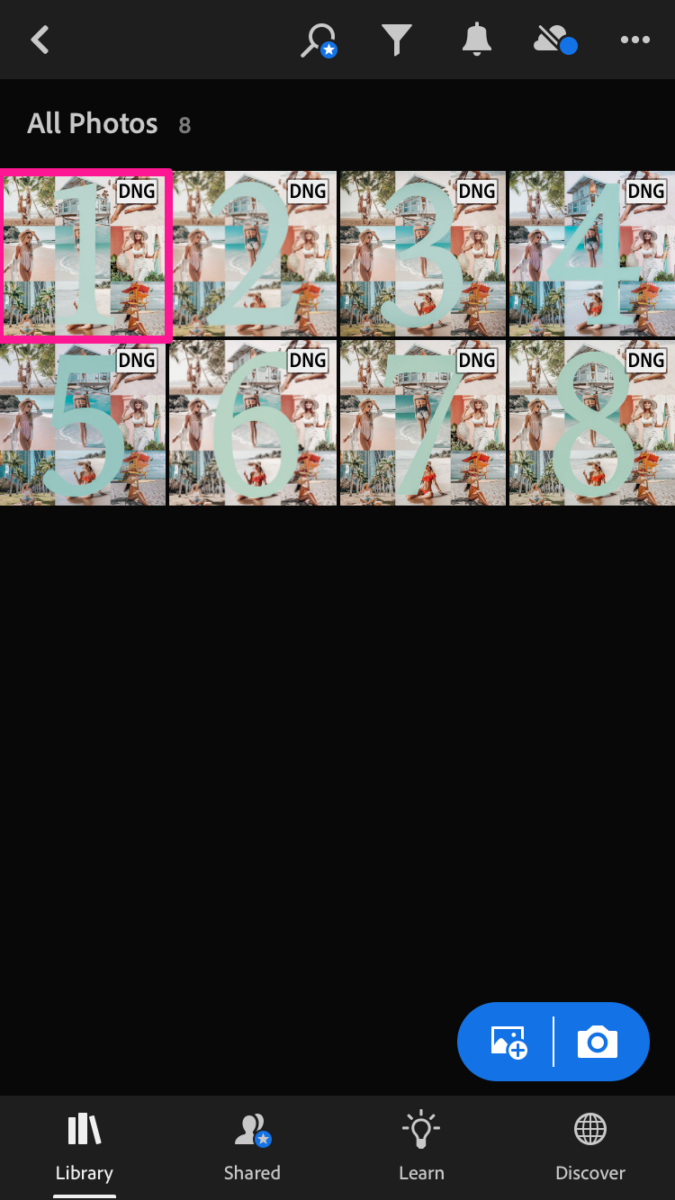
Select preset
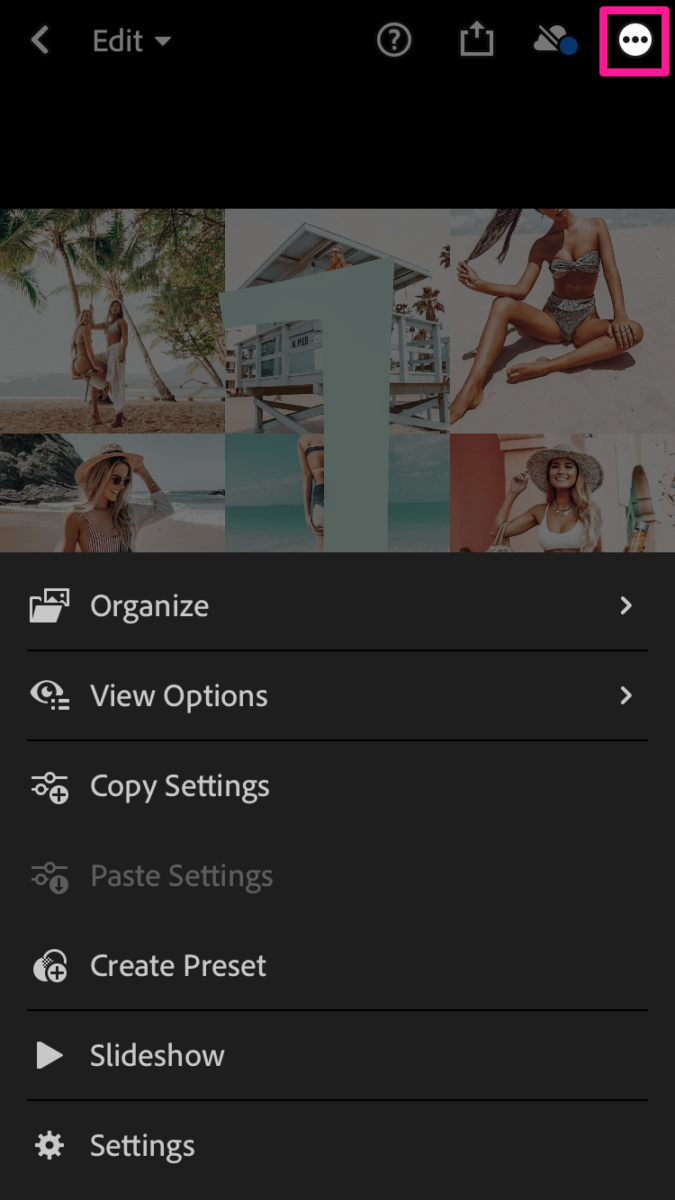
Press Menu
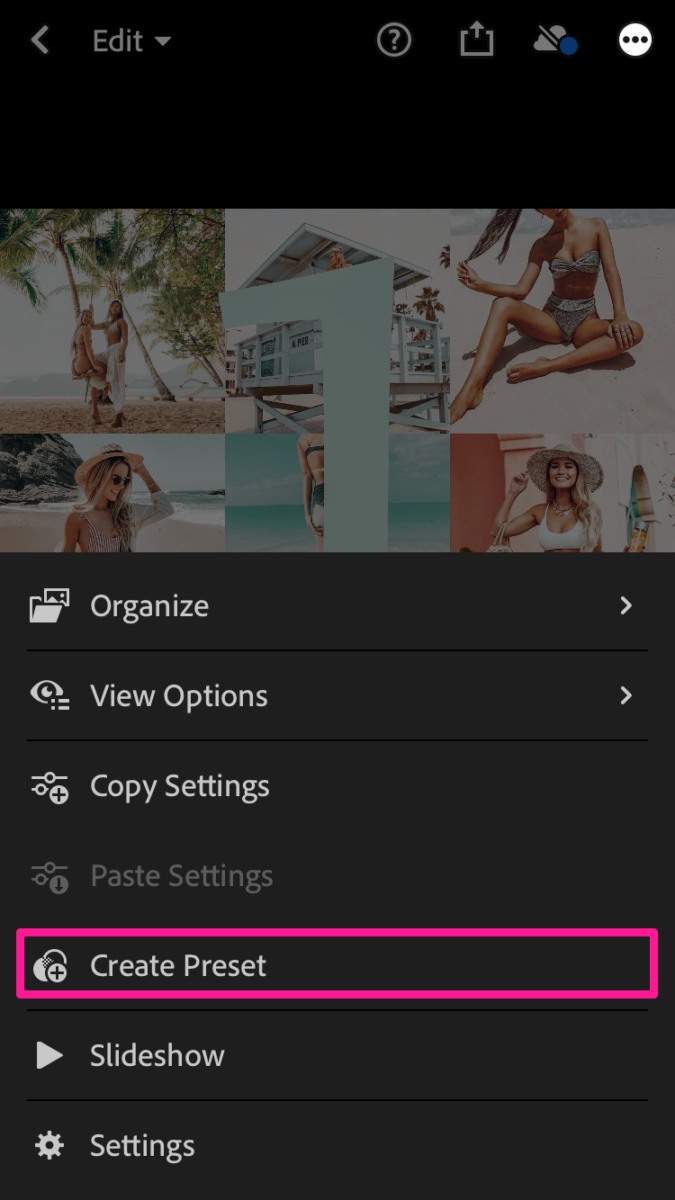
Press CREATE PRESET
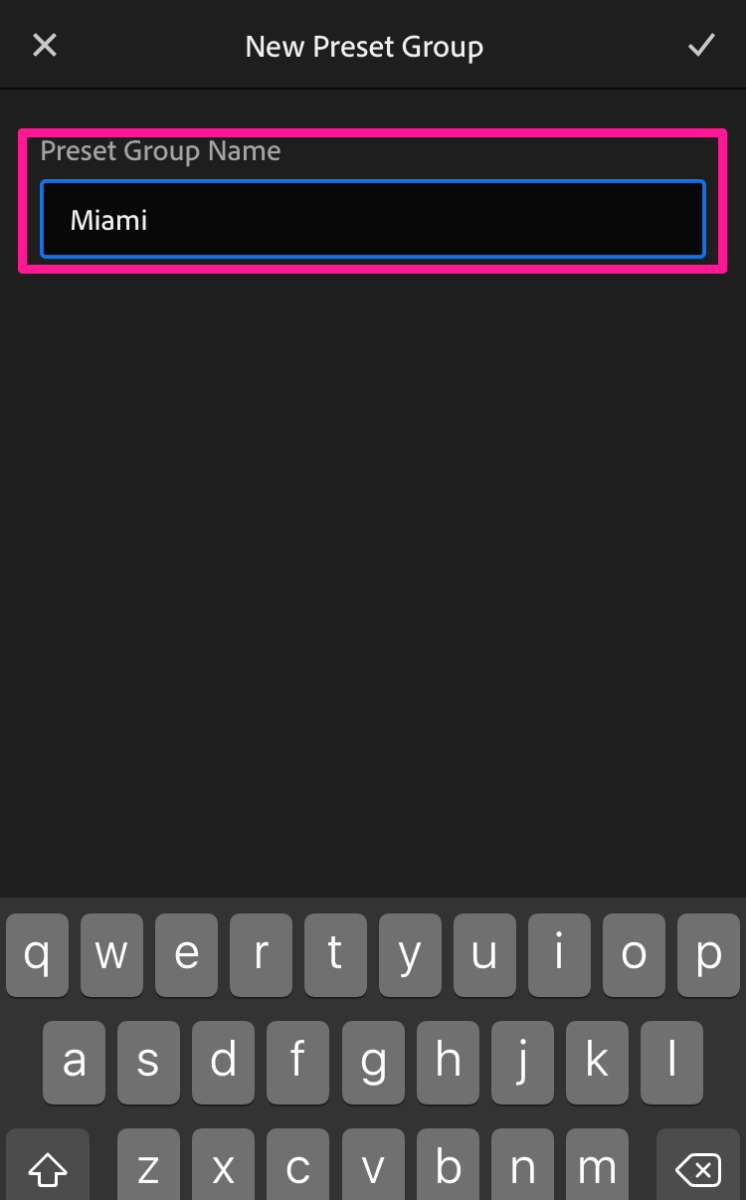
Create Preset Group name
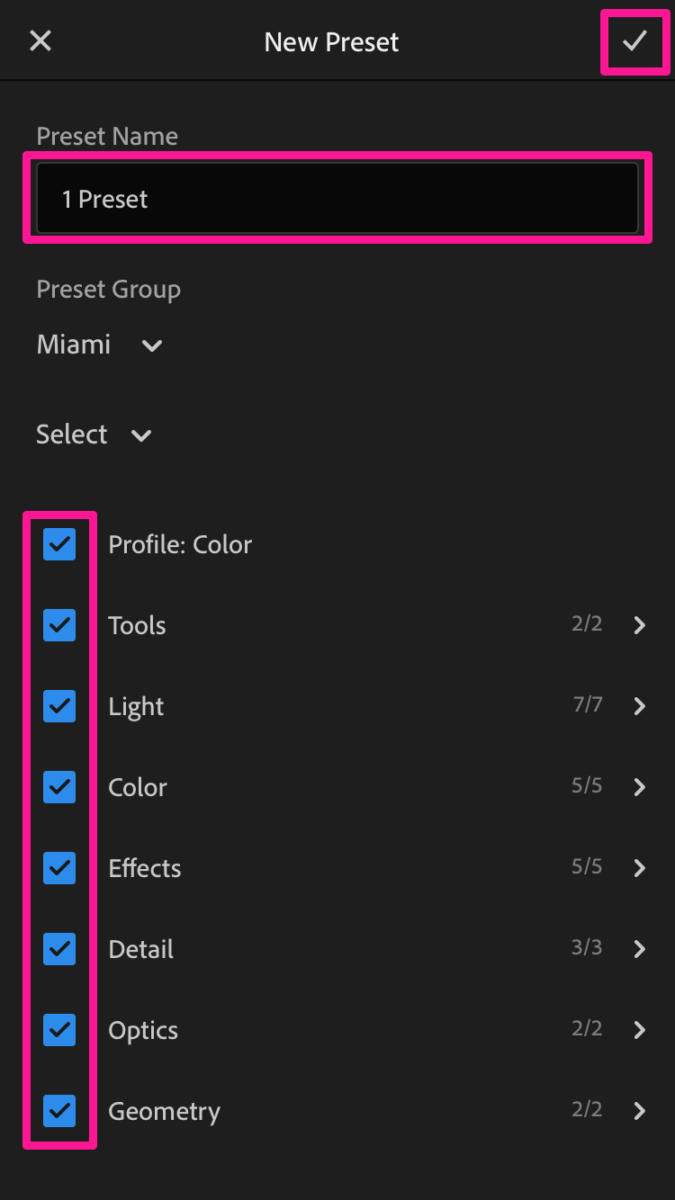
Create Preset nameSelect all propertiesPress Checkmark
5. Editing your photos.
Add your photo to Lightroom and select it.
Scroll the editing panel to the left and select the Presets tab. By default you will get built-in Lightroom filters. Click on the drop-down menu and select the preset group you are creating for the new preset.
To apply a preset to your photo, just click on it. Also, you can easily switch between presets to choose the most suitable for your photo. To apply a preset, click on the checkmark in the upper right corner.
Done, the preset has been applied to your photo.